The most successful lip filler treatments rarely chase size alone. They balance volume with shape, hydration with structure, and surface smoothness with support. That dual aim, enhancement and definition, is what separates a plush, natural result from the overfilled look people fear. After treating hundreds of lips across different ages, ethnicities, and facial proportions, I’ve learned that the best lip filler results come from a tailored plan: the right product in the right plane with measured technique, timed correctly, and supported by smart aftercare.
What “enhancement and definition” really means
Enhancement focuses on volume and softness, the qualities that make lips look healthy and hydrated. Definition sharpens the architecture, like the cupid’s bow, vermilion border, and philtral columns. Patients often ask for more “pop” without looking done. That typically requires both: subtle plumping of the body of the lip and careful contouring along the edges.
A twenty-five-year-old with naturally thin lips might benefit from a lip filler 1 ml approach split between body and border. A forty-five-year-old with lipstick bleed and smokers lines needs less projection, more support, and perhaps a different filler type that integrates well at shallow depths to reduce feathering. The dual approach adapts to each face.
Lip filler types, explained by use case
Most lip filler injections rely on hyaluronic acid (HA), a gel that binds water and integrates into tissue. Within HA, formulations vary in elasticity, cohesivity, lift, and spread. Thick, highly elastic gels are great for building shape in deeper planes. Softer, more spreadable gels excel in the superficial layer where you want seamless blending and hydration.
- Cross-linked HA for volume increase and structure: used in the deeper lip body to add projection, hydrate for a longer period, and hold shape. Soft, low-viscosity HA for definition and fine lines: used in or just beneath the vermilion border, cupid’s bow, or perioral lines to blur creases without bulk.
Outside HA, alternatives exist. Collagen stimulators are not typical for lips due to risk of nodules and stiffness. Autologous fat is an option for specific cases, but the lips demand finesse and fat can be unpredictable in this mobile area. For most, HA remains the best lip filler for safety, reversibility, and natural feel.
If a product doesn’t suit your goal, you’ll see it. A highly lifting gel placed too superficially might look lumpy or create a shelf. A very soft gel in the deep plane might flatten under animation, delivering hydration without enough shape. Matching lip filler types to the desired effect is half the craft.
Anatomy drives the plan
The upper lip has far less bulk than the lower, and in many faces the ideal upper to lower ratio sits around 1:1.6, though a range looks attractive depending on chin projection, dental support, and ethnic norms. The cupid’s bow and philtral columns create the frame. The vermilion border defines the edge where light catches, which is why micro-threading a tiny amount there can give a crisp outline without inflating the lip.
Underfilling is sometimes strategic. Patients with strong dental protrusion or a retrusive chin can look duck-like if the upper lip is over-projected. In these cases, filler to the lower lip or a more conservative upper lip plan creates harmony. Lip filler for symmetry might mean placing just 0.1 to 0.2 ml on a shorter side to balance a natural discrepancy.
The lip filler consultation: setting expectations and building trust
The consultation sets the tone. Good injectors don’t start with a syringe, they start with a conversation and a mirror.
We map what you like about your lips and what you want to change. Do you want a fuller pout, or a sharper cupid’s bow? Are you asking for correction of shape, better hydration, or both? We review medical history, allergies, cold sores, bleeding tendencies, and previous lip filler experience. We talk lip filler risks and lip filler side effects in plain terms: swelling, bruising, asymmetry, lumps, and the rare, serious complication of vascular occlusion.
You should leave with lip filler expectations that are specific. If you bring lip filler before and after photos, we analyze what makes those results appealing: the border highlight, the ratio of top to bottom, the gentle lateral taper instead of a wide, boxy shape. The best lip filler result is one that fits your face at rest and in motion.
Procedure steps, without the fluff
A careful lip filler procedure follows a sequence. Preparation reduces surprises, precision during the session minimizes downtime, and calm aftercare protects the result.
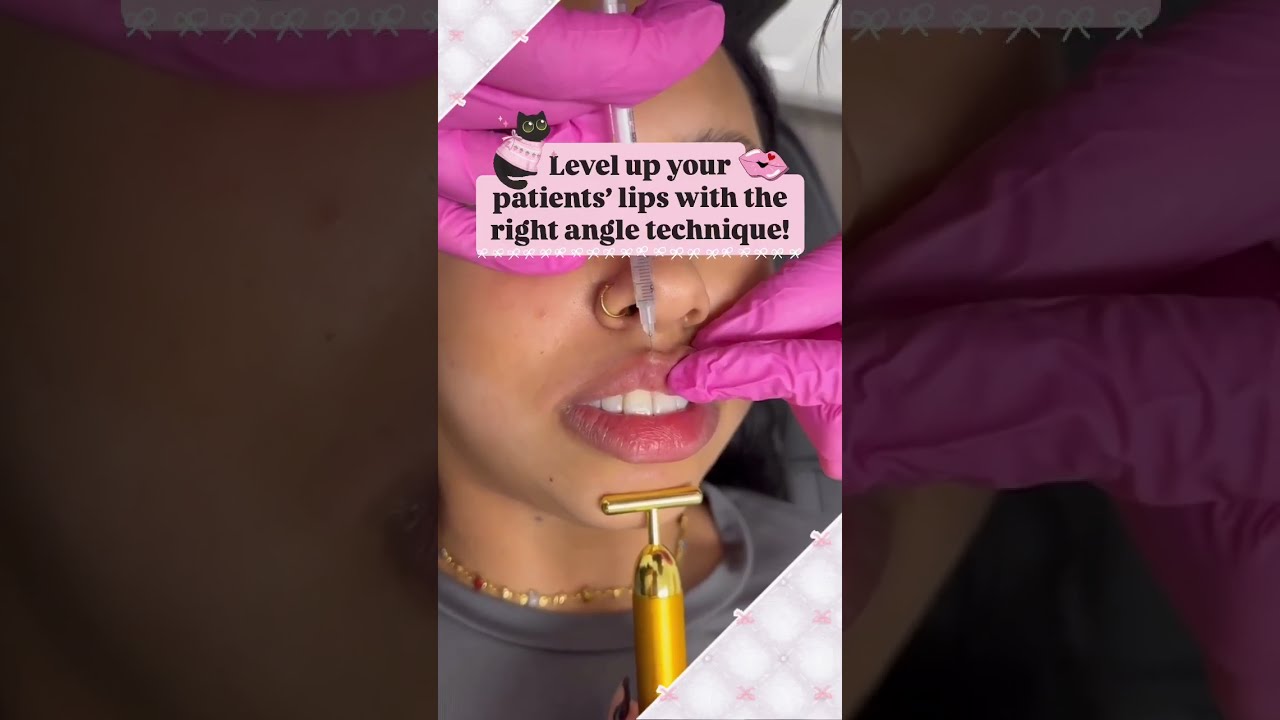
- Preparation: Arrive well hydrated. Avoid alcohol and high-dose fish oil for 24 to 48 hours. If you’re prone to cold sores, start prophylaxis per your provider. A small meal before the appointment helps with comfort. Numbing: Topical anesthetic is common. Some fillers contain lidocaine, which further improves comfort. Most describe the lip filler pain level as a pinch with pressure, more intense at the cupid’s bow and central upper lip, milder at the lateral parts. Mapping and technique: We mark asymmetries, plan columns or border work, then the body. For definition, very small threads along the border help sharpen edges. For enhancement, deeper retrograde threads or micro-boluses in the wet-dry border add volume. I keep the vermilion border crisp and avoid the philtrum’s base to prevent heaviness. Aftercare: Immediate icing, gentle movement, and instructions for the first 24 to 48 hours. You receive a number to call if anything feels wrong, not just a pamphlet.
This is not a one-size-fits-all routine. Some lips look best when we stage treatment over two visits, especially if the skin is tight or the client wants a very natural look. A lip filler 0.5 ml appointment can set the foundation, then a lip filler top up with another 0.5 ml two to four weeks later completes the plan. Smaller increments let the tissue adapt, reduce lip filler swelling, and give you more control.
Cost, dosage, and realistic timelines
Lip filler cost varies by geography, product, and provider. In many cities, expect a range of 400 to 900 per syringe. Some clinics price by 0.5 ml units. Chasing bargains with a needle in the most vascular area of the face is risky; qualifications and complication management matter more than a discount.
Lip filler duration depends on product, metabolism, and dose. Most HA fillers last 6 to 12 months in the lips. Softer gels that integrate quickly may sit at the lower end, thicker gels a bit longer. If your metabolism is high, or if you exercise intensely, you may see faster turnover. Plan for a lip filler touch up at 6 to 9 months if you want a steady, subtle look.
The swelling and bruising timeline that matters in real life
Day 0 to 1: Expect lip filler swelling that peaks the first morning after treatment. The upper lip often looks larger than planned. Some unevenness is normal as fluid shifts. Tiny bruises can appear where the needle or cannula entered.
Day 2 to 3: Swelling starts to recede, shape refines. Lip filler bruising, if present, may darken then fade. The lips can feel firm or lumpy to your tongue. That firmness is typical early on and softens as the filler integrates.
After one week: Most of the swelling subsides. At social distance, the look is close to final. You may still feel a small ridge along the border where threads were placed, not visible to others.
After one month: This is the stable result. Lip filler after one month is your true baseline for decisions about a touch up or minor adjustments. Photos at this stage help track longevity.
Recovery and aftercare that actually help
Basic lip filler aftercare is simple but effective. I prefer a practical checklist that patients can follow, because the right small decisions in the first 48 hours improve lip filler results.
- Ice intermittently for the first 6 to 8 hours, avoiding direct pressure. Keep the head elevated while resting the first night. Skip strenuous exercise, saunas, and alcohol for 24 to 48 hours to limit swelling and bruising. Avoid firm lip filler massage unless instructed. Gentle rolling with clean fingers might be advised in specific cases. Do not schedule dental procedures for two weeks. No dental retraction or injections around the mouth while tissue is settling.
If you notice blanching skin, severe pain, or a patchy, livedo pattern, contact your provider immediately. Rapid recognition of vascular compromise can prevent tissue damage. This is rare, but any clinic offering lip filler injections should have hyaluronidase on hand and established protocols.
Techniques that create natural definition
Lip filler techniques vary. Deep tenting into the red lip used to be common; it creates projection but can lead to vertical ridges. Today, I favor softer, layered work. Micro-threading along the vermilion border gives a clean light reflex. Gentle boluses in the lateral thirds prevent that central-only “duck” look. A touch to the cupid’s bow peaks, not the columns, avoids an overly sharp philtrum.
For lip filler for smokers lines, superficial micro-droplets of a very soft HA along perioral rhytids blur the etched lines without puffiness. If vertical lines are strong, a subtle dose of neuromodulator at the lip border, often called a lip flip, can reduce purse-string activity. That brings us to a common question.
Lip filler vs lip flip, and lip filler vs Botox
A lip flip uses small units of neuromodulator to relax the orbicularis oris at the border, allowing the upper lip to turn slightly outward. It doesn’t add volume, it changes posture. Great for people who want a hint more show of the upper vermilion, or who notice their top lip disappears when they smile. It lasts about 6 to 10 weeks.
Lip filler vs Botox in the lips is not either-or. Filler builds structure and hydrates. Neuromodulator softens muscle pull and lines. If you sip from narrow bottles all day or pursed-lip speak, a tiny neuromodulator dose can support a longer lasting filler result by reducing constant folding.
When things go wrong and how to correct them
Lip filler gone wrong usually falls into a few patterns: overfilling the upper lip, shelfing at the border, nodules, or persistent asymmetry. Sometimes these are product placement issues. Sometimes they show up when an older filler moves with time.
Hyaluronic acid has a safety net: lip filler dissolving with hyaluronidase. In experienced hands, reversal is precise. We can soften a defined area without erasing the entire lip. If migration has occurred above the vermilion border, a dissolve session, a few weeks of rest, and a fresh plan with a different product and technique solves the problem.
Not all lumps are true nodules. Early bumps are often edema. Firm, tender nodules that appear weeks later might be inflammation or biofilm and need a different approach. Your provider should assess before advising lip filler massage or additional product.
FAQs grounded in the day-to-day
How much does it hurt? Most tolerate it well with topical anesthesia and a slow pace. The upper midline hurts the most. If pain is severe during injection, your provider should pause to ensure proper placement and vascular safety.
How long does it last? Typically 6 to 12 months, sometimes longer for cohesive products, sometimes less if your metabolism is brisk or if softer gels were used for lip filler natural results.
What about lip filler 0.5 ml vs lip filler 1 ml? Half a syringe is ideal for Check out here refinement, first timers, or top-offs. One syringe is usually sufficient for a noticeable yet natural enhancement in most lips. Splitting the dose across two sessions improves control.
Will I bruise? Many do. Plan your lip filler appointment at least 10 days before major events. Arnica may help with bruising, but time is the main healer.
Can I exercise? Wait 24 to 48 hours. Increased circulation and heat amplify swelling.
What if I hate it? HA fillers are reversible. Lip filler reversal is quick, though mild swelling can follow. It’s one reason HA remains the safest choice.
Who is a good candidate?
Healthy adults with realistic goals and stable dental and orthodontic status tend to do well. If you are pregnant or breastfeeding, postpone elective treatment. If you have active cold sores, wait until resolved and discuss antiviral prophylaxis. If you are taking anticoagulants, coordinate with your prescribing clinician. Strong allergies require a careful plan.
For beginners, the lip filler guide is straightforward: start conservatively, prioritize shape over size, hydrate and support, then decide if you want more volume. The lip filler process works best when you collaborate with your injector and let the tissue dictate the pace.
The artistry of ratios and edges
Volume without definition looks heavy. Definition without volume can look drawn-on. The sweet spot is a smooth, hydrated body with crisp but soft edges. The cupid’s bow should catch light, not look stamped. The lateral lip should taper into the corners without a sharp cut-off, and the lower lip should carry slightly more fullness than the upper. These are guidelines, not rules. For some faces, a bolder upper lip balances a strong jaw. For others, a pillowy lower lip keeps the face relaxed.
I keep a mental checklist during treatment. How does the lip look at rest and in smile? Do the teeth show comfortably? Is projection balanced with the nasal base and chin? Does the vermilion border reflect light evenly from peak to peak? Subtle changes, like a 0.05 ml micro-bolus at the lateral lower lip, can transform the entire mouth’s expression.
Managing the healing process and daily life
Lip filler healing time is short, but the first three days test patience. Many clients text me on day one saying the upper lip looks too big. By day three, the panic fades. Good lighting and neutral mirrors help. Resist the urge to constantly touch your lips. Hydrate well. Sleep slightly elevated the first night. Stick to a soft toothbrush for a day or two.
Lipstick sits beautifully after a week. If you had fine-line work around the mouth, choose creamy formulations at first. Matte products can accentuate temporary dryness after treatment. Avoid strong exfoliants around the mouth for several days.
Maintenance, longevity, and timing touch ups
Lip filler maintenance isn’t complicated. Schedule a check-in at two weeks. If small asymmetries persist, a micro-adjustment with 0.1 to 0.2 ml can make a major visual difference. Plan a lip filler touch up at 6 to 9 months if you want to maintain a steady fullness without the cycle of full fade and refill. Over time, many notice they need less product as the tissue remains more hydrated and the border retains its shape.
Longevity varies. Runners, those with high basal metabolic rate, and people who gesticulate with animated lips may metabolize filler faster. Using a slightly more cohesive product for the lip body and a very soft gel for definition can balance look and durability.
Safety, myths, and realities
A few facts help separate lip filler myths from anxiety.
- Most HA fillers are reversible with hyaluronidase, which experienced clinicians keep on hand. Vascular occlusion is rare, but every injector should know how to diagnose and treat it. Pain out of proportion, blanching, and a livedo pattern are red flags. Migration often reflects technique, product choice, or repeated top-ups placed too superficially. It is not an inevitable fate. Using appropriate planes and spacing treatments reduces the risk. Filler does not stretch lips permanently when used judiciously. Overfilling repeatedly can, which is why an honest injector will sometimes say no or suggest a dissolve and reset.
If you’re searching “lip filler near me,” focus on credentials, portfolio consistency, and post-treatment support. Ask what filler options they carry and why. Look for a provider who talks about lip filler risks and lip filler aftercare before discussing syringes.
A note on style trends and personal taste
Trends come and go. The Russian lip style, for example, emphasizes vertical columns for strong lift and a flat profile. It suits a narrow set of lips and can look striking in photos, yet stiff in motion. A classic, softly tapered style with a defined cupid’s bow and hydrated body tends to age better and read as “you, but well rested.”
Your lifestyle matters. If you wear minimal makeup, a natural lip filler look with a hint of Village of Clarkston, MI lip filler border definition and subtle volume will feel authentic. If you love bold lipstick and crisp liner, a bit more definition at the vermilion border can be practical, since pigments sit cleaner and bleed less.
Step-by-step for first timers
If you are booking your first appointment, use this as a quick guide from consultation to follow-up.
- Consultation: Share goals, medical history, and photos you like. Ask about lip filler techniques explained in plain language, product choices, and a plan for symmetry. Preparation: Avoid alcohol, aspirin, and heavy supplements for 24 to 48 hours unless medically necessary. Start antiviral if indicated. Treatment day: Expect numbing, mapping, and a paced, communicative session. Mild pressure and stinging are normal. Recovery: Ice gently, avoid heat and strenuous activity for 24 to 48 hours, follow your lip filler care instructions. Call for any unusual pain or color change. Review: Return at two weeks for an assessment. Decide on small adjustments or save them for the next visit.
When filler isn’t the answer
Sometimes lip filler alternatives make more sense. If your main concern is gummy smile, a neuromodulator to the levator muscles can help. If your lips invert under a tight upper lip muscle, a lip flip may be better than filler. If your teeth or bite angle the lip inward or outward dramatically, dental work changes the frame more effectively than any syringe. A good injector will raise these options, even if it means not treating that day.
The quiet power of restraint
The most common compliment my lip patients hear is not “great lipstick” or “who did your lips,” it is simply “you look fresh.” That’s the hallmark of a balanced approach: a slight volume increase, clean definition, hydration without shine, symmetry that doesn’t read as engineered. It’s a result that photographs well, survives candid laughter, and looks at home on your face five years from now.
If you’re new, start with a half to one syringe and a clear plan. If you’ve had filler before and want a reset, consider lip filler dissolving and rebuilding with a product and technique that fit your anatomy. If you want dramatic results, we can do that too, but even bold lips need architecture. The border and cupid’s bow are not afterthoughts; they are the frame that makes volume look intentional.
Enhancement makes the lips fuller and softer. Definition makes them precise and expressive. With careful product selection, thoughtful technique, and honest follow-up, you can have both.